Blog
The Phantom Printer
 This post will serve to help resolve the ever so famous “Phantom Printer.” For those who are unfamiliar with the “Phantom Printer,” this is referred to when your printer is installed on your device and can be chosen from the drop down list of printer properties, but does not appear in the Devices & Printers location. It has no effect on the printing itself, and does not cause any issues besides the obvious visual of “Where is this printer device if not in the Devices & Printers location?”
This can be easily misleading to the end user when they attempt to change the default printer and are unable to locate the printer itself. Not only is this an issue for the end user but as well as the IT professional attempting to resolve the issue. How can we get the information from the printer device if it is unable to be located? I myself attempted all of the standard troubleshooting methods with no resolution. I uninstalled the printer entirely and re-configured it from scratch. I removed and reinstalled all printer drivers and software associated with the printer. I attempted to restart the “Printer Spooler,” and finally restarted the computer device several times. The computer device was understanding the installation of the printer and going through the processes properly, but could not finalize the step of visually displaying it.
If all of these methods have been attempted to resolve your “Phantom Printer” and they still persist, here is the end resolution I have implemented. The “Print Management” system is where you want to be to edit all of your printers installed on your system, whether they are visible or not. This location gives you information pertaining to all printers installed on your device as well as the printer you are having issues with. You can manage and view the printer driver versions and delete the driver version from your system. You can also delete the printers themselves and view jobs stuck in the queue. This will also show you all of the duplicate printer devices that were created due to this “Phantom Printer” issue.
Here is how to locate the “Print Management” tool and the printer(s) that are giving you trouble.
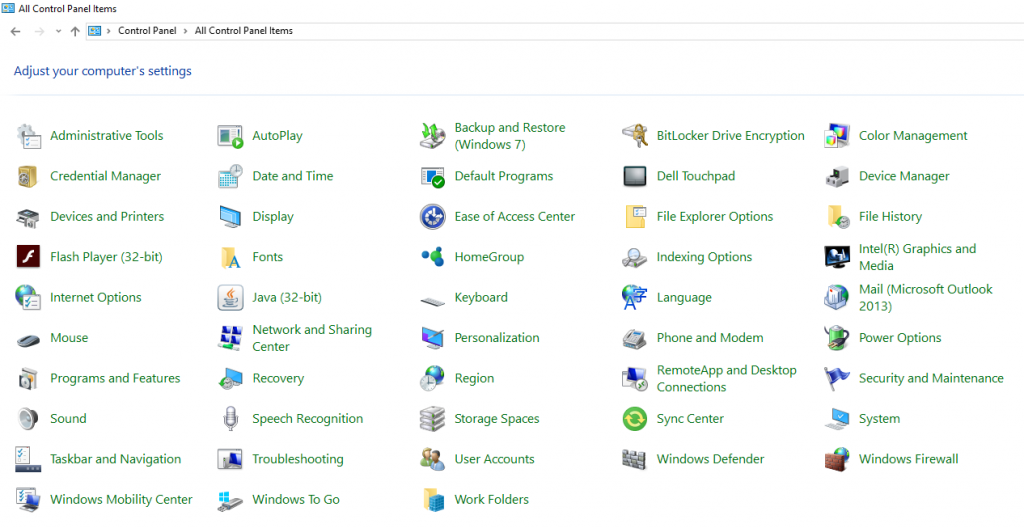
- Go into the Control Panel
- Open Administrative Tools
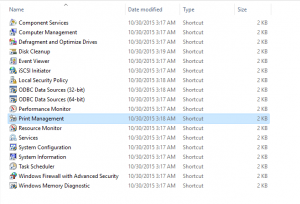
- Locate & open the Print Management Tool
- Click on the Custom Filters
- Click on the All Printers tab
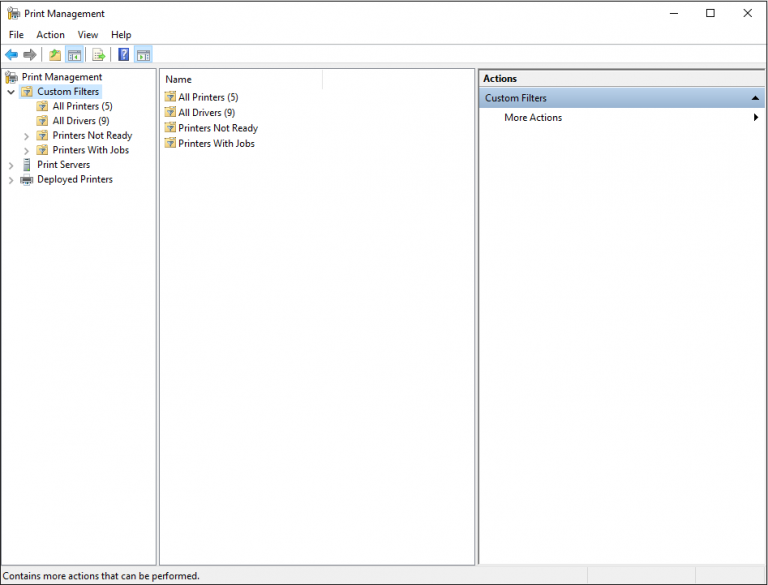
- Locate the “Phantom Printer” delete it from here
- Reboot the system and reinstall
Beringer Associates, a Microsoft Gold Certified Partner, is always here to provide expert knowledge in topics like these. Please contact us with any questions you may have.
Recent Posts


How can we help?
Whether you're seeking a fully managed IT solution or expert assistance with a Microsoft solution, we're here to provide expert advice whenever you need it.
Call us at (856) 322-8416 or complete the form below and we'll help in any way we can.
