Blog

CRM 2016 Document Templates
CRM 2016 now offers a better way to create and utilize document templates. The older versions of CRM were very limited in the entities that could be associated to an email or mail merge template. The new process allows users to select a primary entity and then choose both a 1:N and N:N relationship. Unfortunately, the relationships are only one level deep. But this is a vast improvement. The Templates also allow for an easy way to include Repeated Nodes. So if you want to include all of an Order’s Line Items in a document, you will have no problem doing so.
So Let’s Get Started
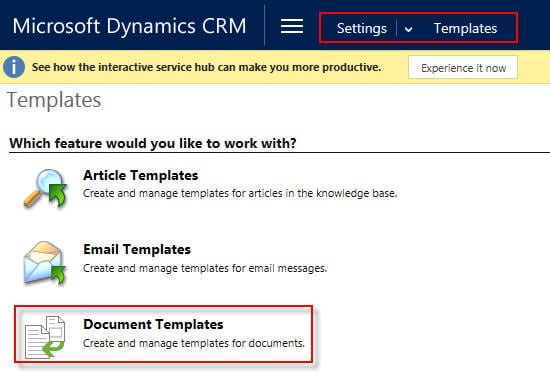
Document Templates can be found in the same area as Email and Mail Merge Templates. Navigate to Settings/Templates and click on Document Templates.
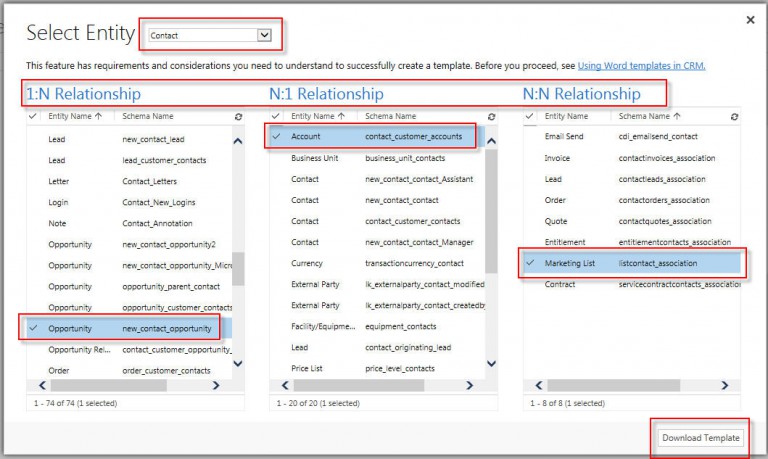
A dialog box will appear and you will need to select which type of Template you would like to create. After selecting, click the Select Entity button.
In the Select Entity dialog, you can now select your entity, select one or many relationships of each type and then click Download Template.
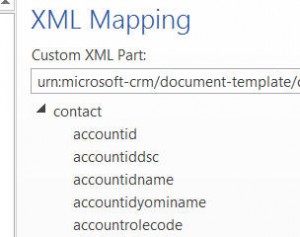
Save the Word template to your local drive and open. Once you have it open, you will need to go to your Developer area in your ribbon. Once there, select XML Mapping. The Developers tab might need to be enabled in Word (Options/Customize Ribbon).
Word will now display an XML Mapping dropdown to the right of the template page. Click on the down arrow and select the option that begins with urn:microsodt-crm/document-template. You will then see your Primary Entity.
If you expand the entity, you will see a list of fields. For the related entities, scroll all the way to the bottom. You’ll see them listed there and you can then expand those to see their underlying fields.
Create Your Template
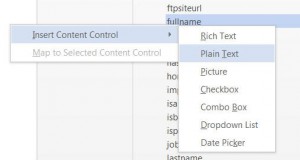
To create your template, layout your form in the usual manner. Then place your cursor where you want to enter data. Now right-click and choose to Insert Content Control and choose Plain Text.
NOTE: the field names need to be exact. You will more than likely need to turn off auto-correct and capitalize first letter of sentences.
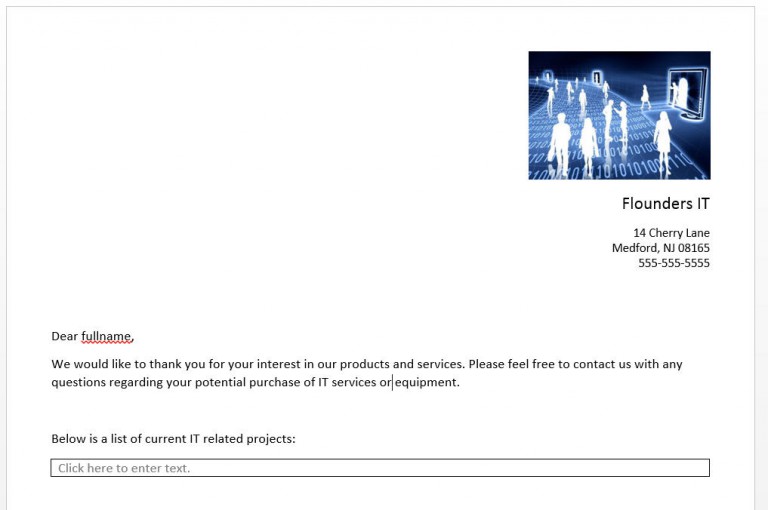
The image below represents a basic template form. Notice that the mapped fields do not look any different than the other text until you highlight one.
To add a repeating node, add a table with one row and multiple columns based on your need. Add the fields you desire to each column. Then highlight the entire row, right-click the entity under the XML MAPPING and choose Repeating.
Upload Your Template
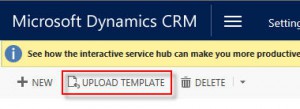
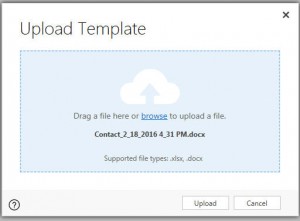
Once your template is created and saved, head back to the Documents Template area in CRM and click the Upload Template button.
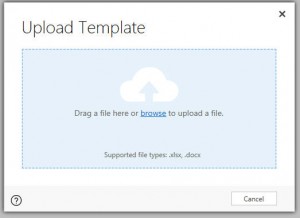
In the below dialog, you can either browse for your file or drag and drop.
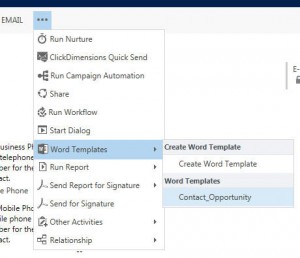
To use your newly created template, navigate to your primary entity and open a record. In the Command bar, click the ellipse and click on Word Templates. Then select your template for rendering.
Open or choose to save your document.
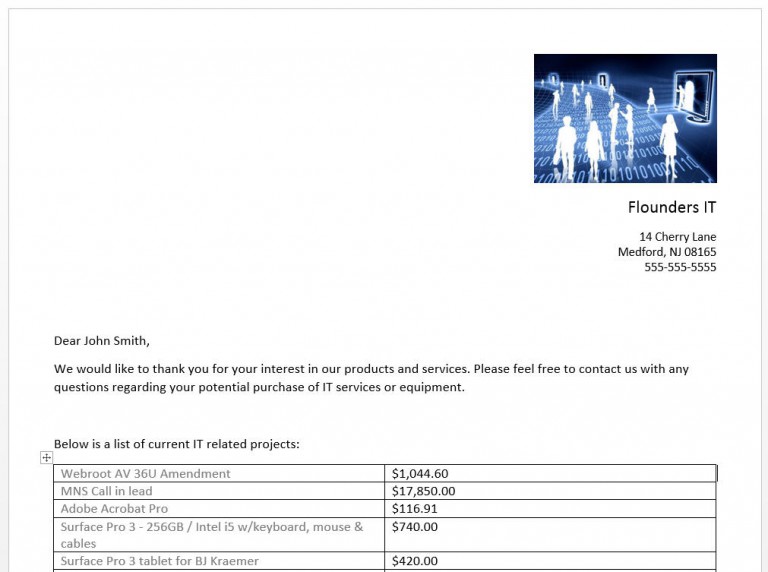
Below is my rendered Document. We’ve auto-filled the contacts name and listed open projects.
A couple points to consider:
- Word Templates can only be run against one record–from within the record. There are other 3rd party apps with more functionality that allow you to run a template against multiple records from a view. Of course, there is a licensing fee to consider.
- After rendering your document, you may receive an error when trying to open it. The error is very non-specific. I believe it has to do with missing data for mapped fields. It might take a few tries to create the perfect template. Consider using required fields in the mapping.
All-in-all a much needed improvement for document creation from within CRM. Remember, this functionality is only available in CRM 2016. If you are currently running an earlier version of CRM, contact Beringer Associates to see how we can get your MSCRM on the latest release.
Beringer Associates is always here to provide expert knowledge in topics like these. Please contact us with any questions you may have.
[code-snippet name=”blog”]
