Blog

Multi-Factor Authentication: Connect your app to Dynamics 365 using a Connection String
As organizations tighten down their security, Multi-Factor Authentication (MFA) is becoming more and more common. MFA has it’s drawbacks, however; as developers and administrators will find it more difficult to connect their apps to Dynamics 365 using an MFA enabled user. If MFA must be enabled, create an Azure AD App and use a connection string to connect to Dynamics 365 properly.
First, we’ll need to create an Azure AD App
Note: Creating and registering Azure Apps can cost money, so it’s important to review your Azure subscription plan before doing so.
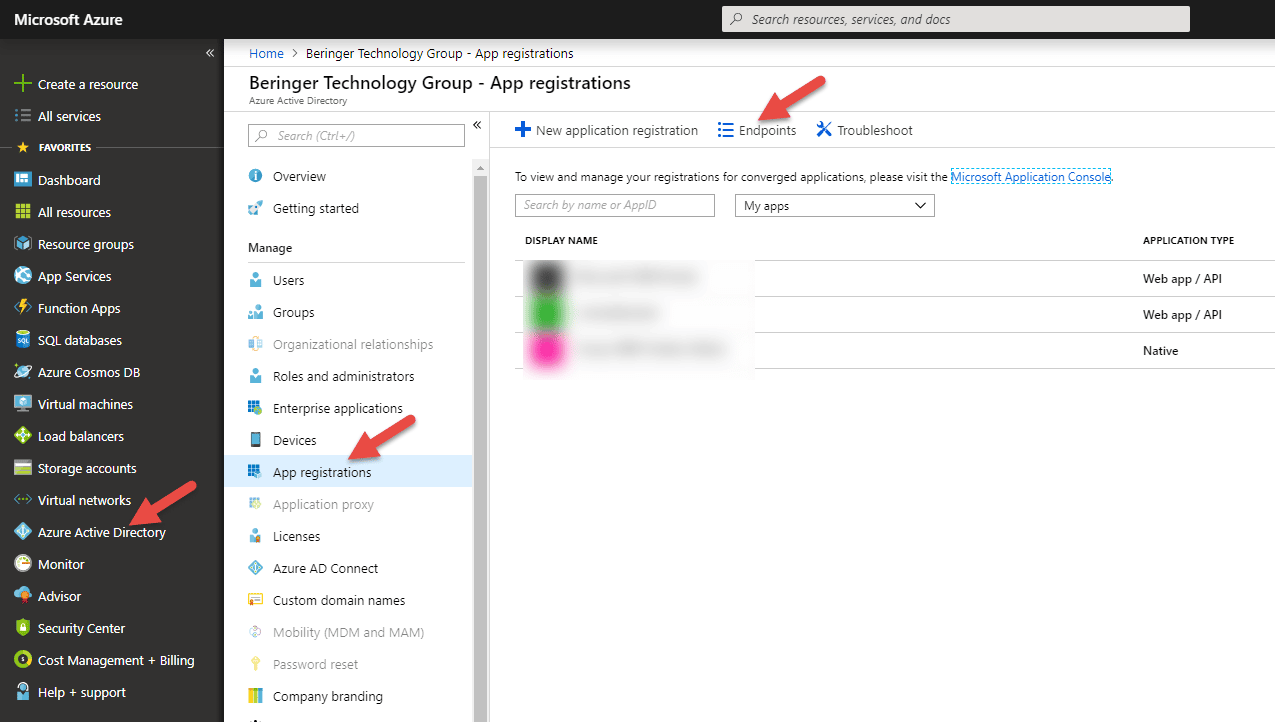
Navigate to your Azure Active Directory, click on App Registrations, and click on Endpoints:
Find the “OAUTH 2.0 TOKEN ENDPOINT,” copy its value and paste to any text editor. We’ll need this value in the next step.
Next, under the App Registrations page, click “New Application Registration.” Give your app a name, set the Application Type to Native, paste the value from the previous step into the Redirect URI field, and click “Create.”
Configure the Azure App
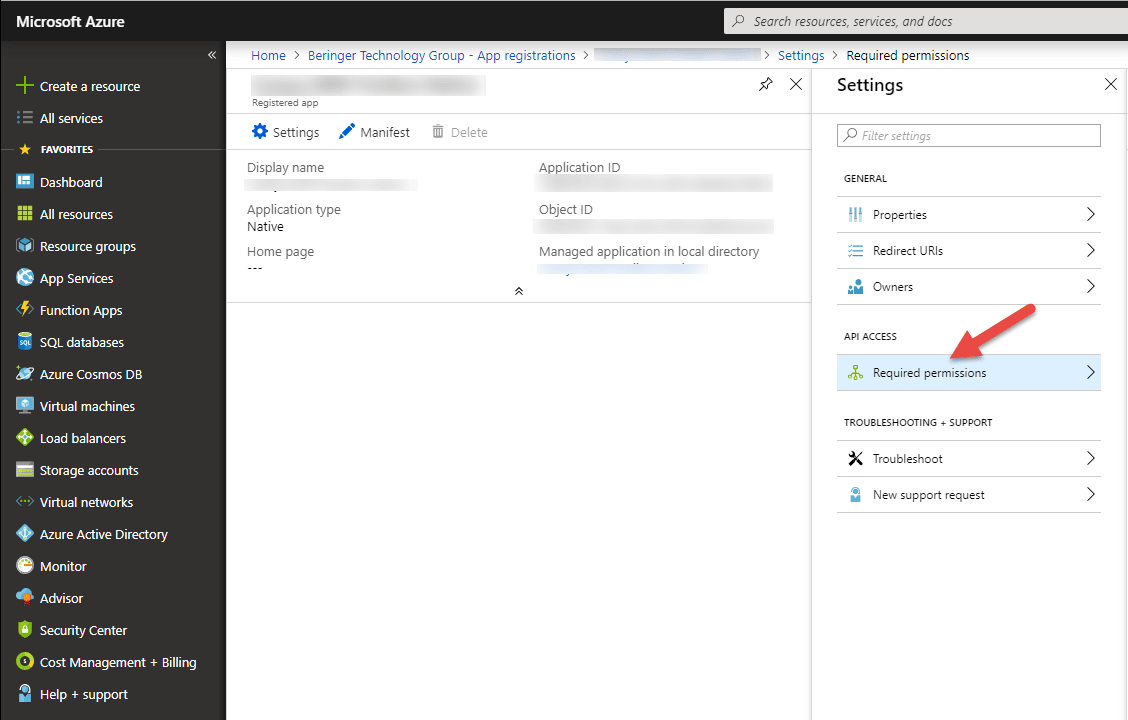
Now that we have our app created, we’ll need to do some configuration. Open the newly created app and navigate to the “Required Permissions” tab:
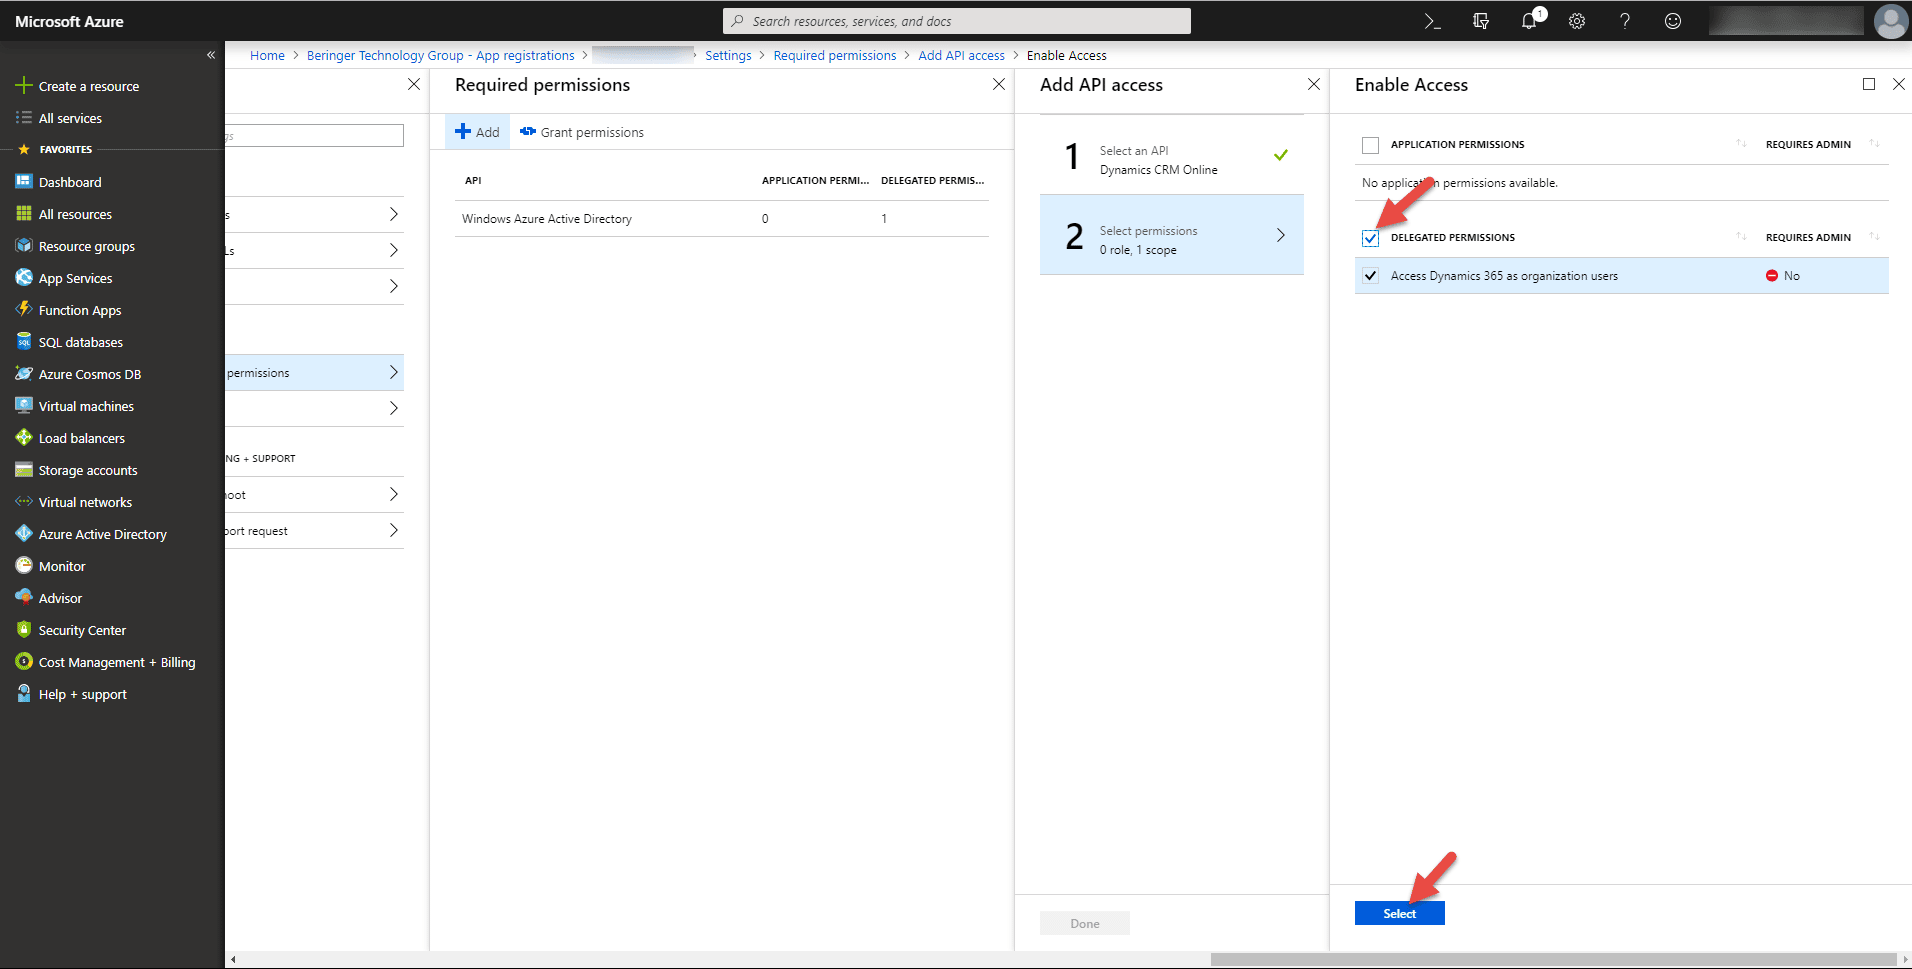
From here, add a new permission, select “Dynamics CRM online” as the API, and click “Select.” Then, check the “Delegated Permissions” box and click “Select”
Click “Done” and then click “Grant Permissions.” Now we have configured our Azure App correctly.
Configure the app that you want to connect to Dynamics 365 using connection strings
Whether you’re connecting your own app to Dynamics 365 or using an open source app, this step will vary quite a bit. For my purposes, I’ll connect to Dynamics 365 with XRM Toolbox. When you create a new connection from XRM Toolbox, you have the option to connect via a connection string. The connection string should be formatted like this:
AuthType=OAuth;[email protected];Password=your_password;Url=https
://organizationname.crm.dynamics.com;AppId=abc123;RedirectUri=abc123;TokenCach
eStorePath=c:\\Temp\\Oauth\\cache.txt;LoginPrompt=Auto
Connection strings are simple lines of text that contain variables separated by semicolons. Here is a breakdown of some of the values in a connection string:
- AuthType: This should be set to OAuth
- Username/Password: the credentials for the user you are looking to connect with
- Url: the URL of the org you want to connect to
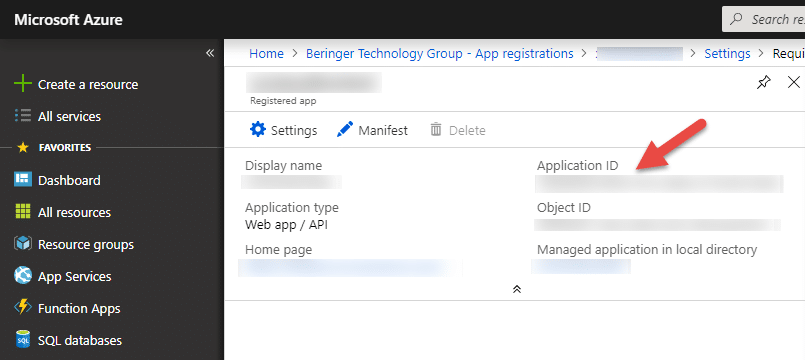
- AppID: the GUID of the Azure App created above. This is automatically generated and you can find the AppID in your Azure App
- RedirectUri: Value entered when creating your Azure App
- TokenCacheStorePath: This will vary if you are running your app locally or in the cloud. Because I am connecting via XRM Toolbox, I’ll keep this path
- LoginPrompt: This will also vary based on your app. Auto is a good default value for this
Depending on your app, your connection string may require more or less variables.
Now, you can paste your connection string into your app (or XRM Toolbox) and connect up to Dynamics 365 via an MFA Enabled user.
Beringer Technology Group is always here to provide expert knowledge in topics like these. Contact us with any questions you may have.
Beringer Technology Group, a leading Microsoft Gold Certified Partner specializing in Microsoft Dynamics 365 and CRM for Distribution. We also provide expert Managed IT Services, Backup and Disaster Recovery, Cloud Based Computing and Unified Communication Solutions.


