Blog

Building a Custom Business App in Microsoft Dynamics 365 Using PowerApps
In this blog, I’m going to show you how simple it is to configure a custom business app in Microsoft Dynamics 365 using PowerApps. That’s right, custom app and configuration! There are a few pre-requisites and assumptions before we proceed:
- You must have System Administrator or System Customizer security roles in Dynamics 365.
- While PowerApps is available in earlier versions of Microsoft CRM, this blog will focus on using the Dynamics 365 Online platform.
What are some of the benefits to creating a custom business app for Dynamics 365?
- Simplify the user experience! This will undoubtedly lead to an increase in user adoption. Streamline what is shown in your app to ensure that only relevant information is shown to this subset of your user group.
- Take advantage of the unified user experience. This app will look the same, regardless of how you users access CRM: using a web browser, on a mobile device or on a tablet. Additionally, PowerApps are built to support responsive design to adapt to the size of the screen being used.
Now, let’s get started with how to build your very own custom app! As a responsible System Administrator who follows best practices, you are of course building this App in your Sandbox and in a solution.
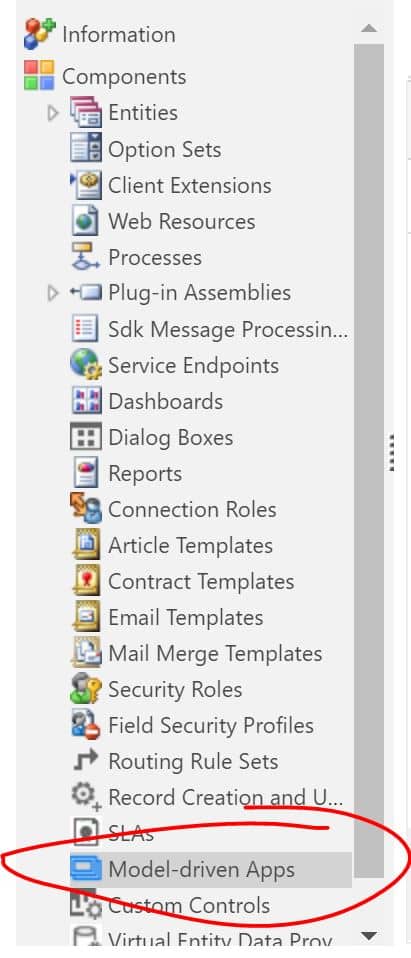
- Within your Sandbox solution, find Model-driven Apps under your Solution Components
- Click New to build a new App, or Add Existing to modify an existing App.(For this blog, we will create New)
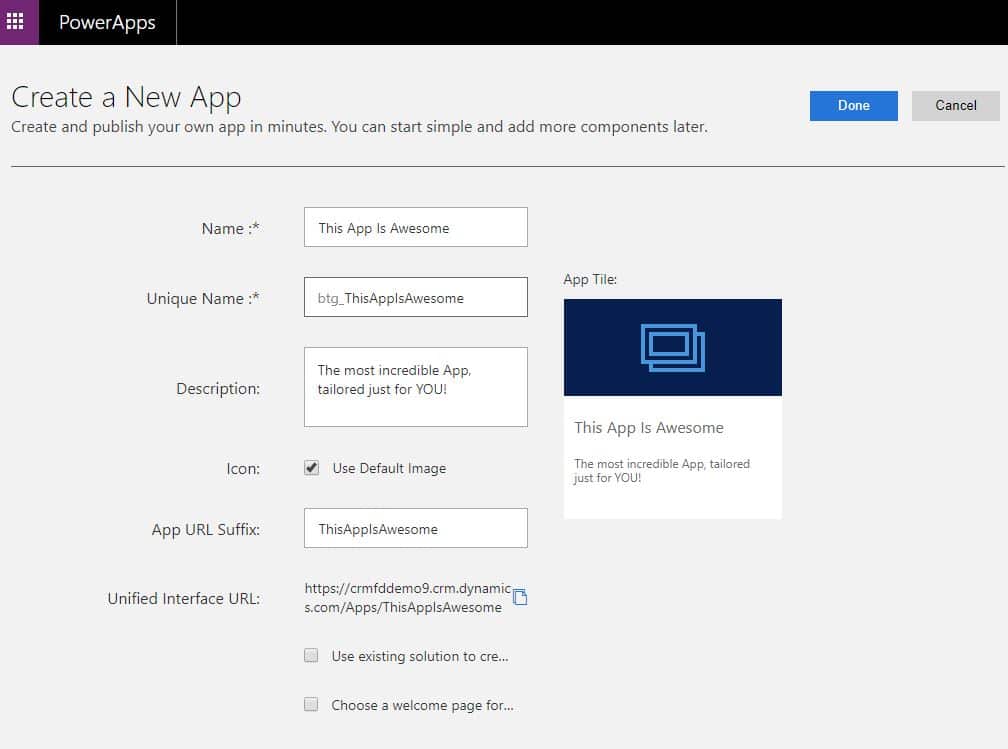
- Create your App! Provide details for Name, icon and other items. Once you have named your app, click Done.
- Now you can build your App! Select App components. As you add components (like Dashboards), any dependent Entities will be added to your App.
- Site Map: This will become your App Navigation. When using this App, users will only have access to the areas of CRM that you add here.
- Components: Area, Group & Subarea
- Artifacts
- Entities: Which areas of CRM will be accessible in this App?
- Dashboards: Streamline the dashboards available! Only show those that help your end user group to do their daily tasks.
- Business Process Flows: Select only the ones your targeted users of the App will need.
- Entity Assets: Select entities, forms, system views and charts available. Best Practice Tip: Less is more! Keep it simple, System Admin!
- Forms
- Views
- Charts
- Dashboards
- Site Map: This will become your App Navigation. When using this App, users will only have access to the areas of CRM that you add here.
- If you are ready to view your app, Save. Then click Publish.
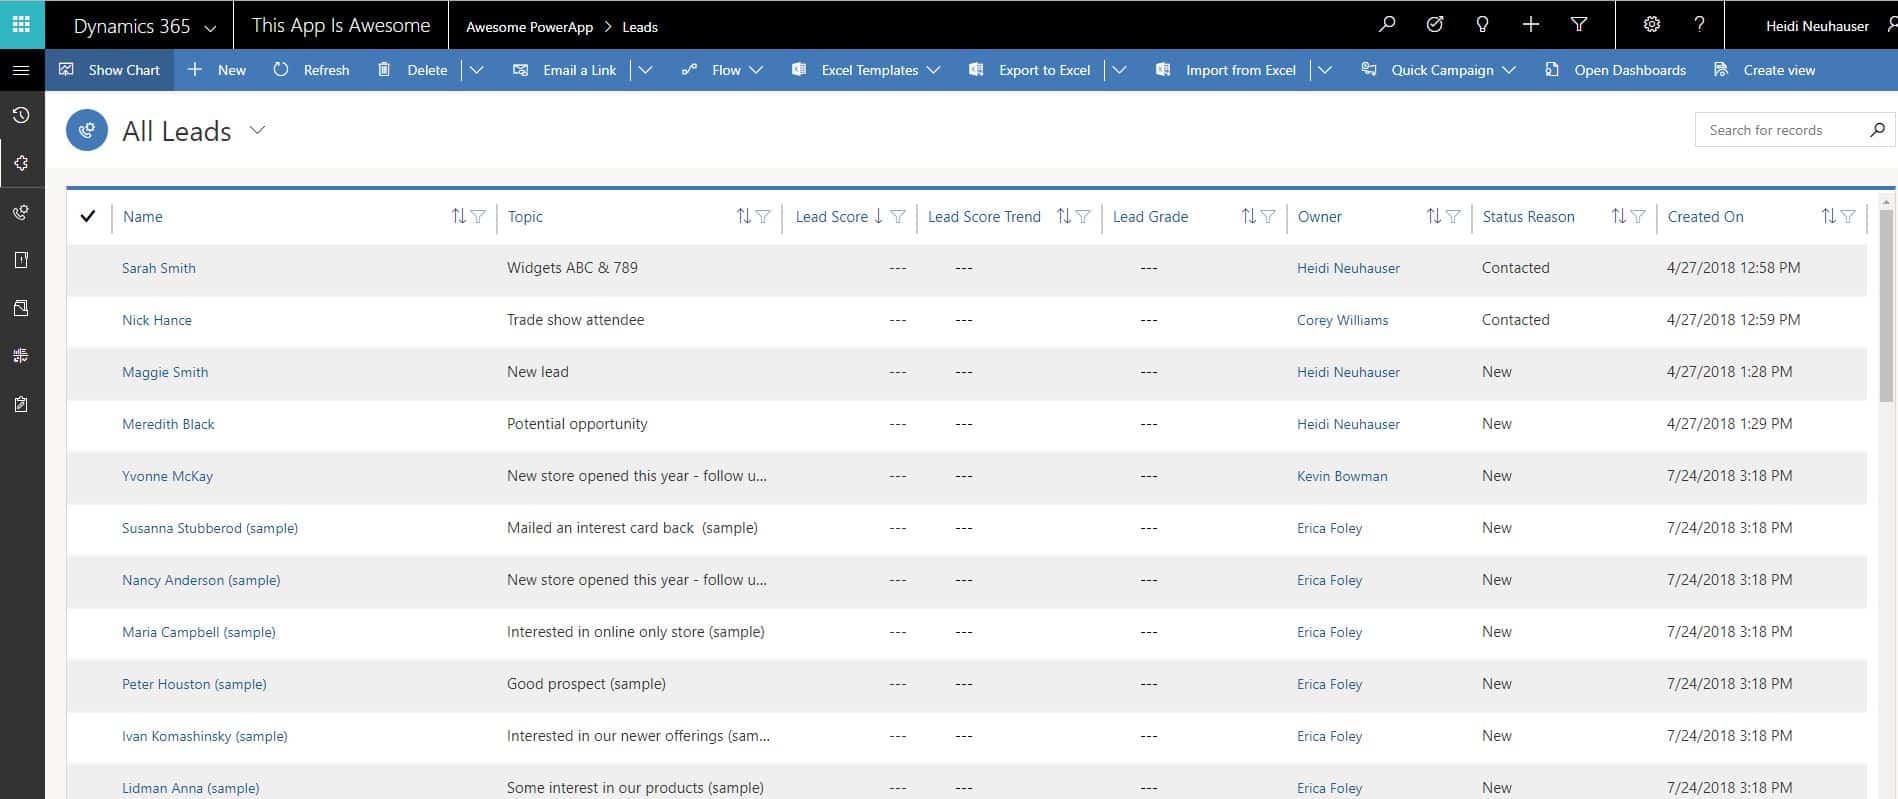
- In the upper right hand corner, click Play. This launches your App – see how it looks to your end users!
Note: Your App will not be accessible until you apply security roles to it. Watch for a future blog to address this topic!
A few parting tips:
Make sure you understand the users who will be using this app. Build it with them in mind! Better yet, involve some of those end users in the build and design phase to ensure you are delivering a product they like and will use.
Need help configuring an App or two? We are PowerApps experts at Beringer Technology Group. Let us help you make sure you don’t miss the mark when it comes to PowerApps.
Contact Us!
If you have questions please do not hesitate to contact us at 800.796.4854. We can help you with all of your Dynamics 365 needs. Beringer Technology Group is a Microsoft Gold Certified Partner and has proven excellence in Managed IT Services.
Beringer Technology Group, a leading Microsoft Gold Certified Partner specializing in Microsoft Dynamics 365 and CRM for Distribution. We also provide expert Managed IT Services, Backup and Disaster Recovery, Cloud Based Computing and Unified Communication Solutions.


